Saturday, November 3, 2012

Udon Soup


I've been enjoying the Facebook posts from my friend Stephanie who is stationed in Japan, and they've got me a-hankerin' for some Japanese food.  Not that it takes much for me to want some nihon-ryōri...I'm pretty sure I was Japanese in a past life.   With the cool weather upon us, I was looking for a hearty soup.  I ordered some Nabeyaki Udon from a local Japanese-slash-Chinese restaurant, and was pretty let down.  So, I thought I'd give it a shot making from scratch.  Now I feel foolish for paying $20 for something so easy to make.

Udon are a thick, chewy wheat noodle, served hot in soups, pan fried, or either hot or cold with dipping sauces.  The have a very pleasant al dente texture, and are best either fresh or frozen.  I used frozen, as do most American Japanese restaurants.  I may try making them from scratch.  They are deceptively simple, just flour, salt, and water, but it seems there is an art to getting the proportions just right, as well as creating the right gluten development through pounding or kneading (traditionally through stomping on the dough in a bag).   In any case, the frozen were very nice, and only needed to be dropped in the broth and heated through.

Wakame is the green seaweed typically found in miso soup.  It comes dried in shreds, looking like black tea.   Soak it in cold water for 5 minutes, and it will bloom into lovely translucent green strips that can be added to the soup.  If you cant get wakame, try some blanched or frozen spinach, or similar greens. 

Mirin is a sweeter cousin to sake, primarily used for cooking.  If you can find it, the better quality mirin will have no added sugar or high fructose corn syrup, but it can be hard to find outside Asia.

Krab sticks are available in the seafood section of most grocery stores, and in Asian groceries.  Kamaboko is a fish cake, often colored pink or red on the outside, and is available at Asian groceries. If you can't find it, just add a couple more krab sticks.

This recipe has almost no cooking, and comes together very fast.  Have everything prepped before you start, and it will go very easy.
 

Udon Soup
Serves 2-3 as entree

5 cups hot water
2 tsp instant dashi granules
⅓ cup light shoyu
3 Tbs mirin
2 blocks frozen udon noodles
3 small shitake mushrooms, reconstituted in boiling water if dried
1 Tbs dried wakame seaweed, soaked in cold water and drained
1 Tbs Shiro (white) miso
2 "Krab Sticks" per person
2 slices kamaboko (fish "cake") per person
1 whole raw egg per person
1 scallion, sliced

Soak the wakame in cold water and the shitake in boiling water in a coffee mug, about 5 minutes for both, draining when reconstituted.

Bring water to a boil in a medium pot, reduce to high simmer.  Add dashi, shoyu, and mirin.  Add udon straight from freezer, heating through and agitating to loosen, about 2 minutes. 

Meanwhile heat a large serving bowl by adding very hot water, cover with a pot lid. 

When noodles are heated through, add drained wakame to pot.   Remove from heat, and stir in miso.  Empty serving bowl, then transfer noodles and most of the broth.  Sprinkle with half the scallions, and then add the eggs directly into the broth to soft poach, topping with the lid to steam.  Meanwhile, drop the krab sticks and kamaboko slices into the pot with the reserved broth to heat through.  When the egg has soft poached after a few minutes, add the krab sticks and kamoboko to the pot, sprinkle with remaining scallion, and serve.


Tuesday, October 23, 2012

Pumpkin Chipotle Pozole


From Wikipedia: Pozole (Nahuatl: pozolli), which means "foamy"; variant spellings: pozolé, pozolli, posole) is a traditional pre-Columbian soup or stew from Mexico, which once had ritual significance. It is made from nixtamalized corn, [Hominy] with meat, usually pork, chicken, turkey, pork rinds, chili peppers, and other seasonings and garnish...Since corn was a sacred plant for the Aztecs and other inhabitants of Mesoamerica, pozole was made to be consumed on special occasions. The conjunction of corn (usually whole hominy kernels) and meat in a single dish is of particular interest to scholars because the ancient Mexicans believed the gods made humans out of masa (cornmeal dough)...It is a typical dish in various states such as Sinaloa, Michoacán, Guerrero, Jalisco, Morelos, México and Distrito Federal. Pozole is often served in Mexican restaurants in the American Southwest.

To celebrate autumn, I took this formerly special occasion stew, and combined it with another seasonal festive ingredient, pumpkin.  The spiciness of the stew, the smokiness of the chipotles and the sweetness of the pumpkin made a contrast that complimented the contrasts of textures between soft beans, tender pork, and al dente hominy.  Hominy is a kind of big, puffy, chewy corn, that tastes like a corn tortilla or tamale.  It has been treated, like masa, to release more nutrients, but I like it for the taste and texture.  You can find it either by the canned corn, or with the Mexican ingredients.  Either yellow or white will do.

Ingredients:
Mirepoix of chopped celery, carrot & onion, about 1 carrot, 1 onion, and two ribs celery worth.
6 cloves garlic, minced
2-3 lbs cheap pork, like pork butt or country-style boneless ribs, cut in bite size chunks.
Water
1 pie pumpkin
1 onion, diced
1 large can diced tomatoes
2 cans hominy
1 can pink beans
1 can chipotle in adobo, 1-2 peppers minced, sauce from can reserved
1 can chopped green chilis, rinsed
oil
1 stick unsalted butter
chili powder
Mexican oregano
4 packets Sazon seasoning
cinnamon
salt & pepper

Cut pork into bite size chunks, approximately 1" cubes.  Toss with salt, chili powder, and oil.
Add additional oil to a large stock pot, and sweat the mirepoix with some salt over low heat.  When onions begin to turn translucent, add garlic, cook one more minute, then remove vegetables and set aside. 

Crank up heat, and brown the meat in batches, turning to brown evenly.  Add water, about a gallon, and return mirepoix and garlic to pot.  Add Sazon seasoning, minced chipotle peppers to taste, and all the adobo sauce you can get out of the can.   Wear disposable gloves to keep the capsaicin in check if you have them!  Simmer, covered, on very low heat until pork is very tender.  I let it go all night. 

Strain soup through a fine mesh sieve, remove pork to a container, and discard spent mirepoix.  Refregerate both pork and broth.  When a disk of fat solidifies and hardens on the surface of the broth, remove, and skim up any remaining droplets.

To finish, reheat broth, reducing at a boil if needed.  Add onion, green chilis, and simmer.

Meanwhile, preheat oven to 400 °F.

Cut, scoop out, and peel outer rind from pumpkin.  This will take a while, unless you have a very good peeler, but you can do this ahead of time.  Cut into 1" chunks.  Melt the butter in large microwave-safe bowl, and add pumpkin, tossing to coat.  Toss with generous amounts of cinnamon, and a light sprinkling of chili powder.  Spread evenly on a cookie sheet covered in foil, and bake for 45 min to an hour, until soft, with a nice outer crust.


Meanwhile, add tomatoes, drained hominy, pork, and a few tsp Mexican oregano to the pot, and simmer.  When pumpkin is finished and cool enough to handle, add what you were able to keep from popping into your mouth into the pot.  Just before serving, add beans and heat through. On serving, sprinkle bowls with additional oregano, or give guests some on the side to sprinkle on their own. 


Saturday, October 20, 2012

Tamagoyaki: Easy rolled Japanese omelet


When you want to shake things up at breakfast or brunch, this is a very cool alternative that will make people think you have mad skills.  The flavors are interesting and subtly different, but this is a super easy recipe.  If you are making more than one serving, you can make a few of these and then slice and serve.  The rolling technique can be seen here.

Tamagoyaki


¾ cup egg beaters (or 4 large eggs)
1 Tbs tamari or other soya sauce
1 Tbs granulated Spenda (or sugar)

Mix all ingredients.   Nonstick spray or oil a large nonstick pan and heat over medium low – medium heat, as you would for any omelet.  Our mixture evenly in pan, cooking until mostly set.  Swirl pan to run remaining liquid egg around edges, like a crepe.  Fold sides in to make a rectangle. Roll omelet,  aiming for a 2” wide, flat roll.   Remove to a fine cooling rack, or to a cutting board with paper towels, and allow to cool.


To serve: Place on a cutting board and trim both ends square.  Cut in half, then half again, until you have 1” thick pieces.  Arrange on plate.  Garnish with my sesame sauce (below) and black sesame seeds, but you could do a lot of other options for garnishing, including more traditional.  Some teriyaki or unagi sauce would go very well with the sesame sauce for contrast.

Serving suggestion: serve with some funky melon and lox or kippers.

Sesame dressing


I use this as an alternative to Japanese mayonnaise sauces.  It is lighter, and tastes better in my opinion, but is better for you too.  Makes a great salad dressing. You can also spice it up with Chinese 5-spice or Thai spice blends for use with fish, as an Asian alternative to tartar sauce.

These proportions are guesses, I do this to taste, and so should you.  It should be pale tan, with a salty-sweet, subtle flavor, with a creamy consistency.  The primary flavor should be of sesame.

Plain, Nonfat Greek Yogurt   1/4 cup
Tamari or other soya sauce 1-2 tsp
Splenda or other sweetener 1-3 tsp
Sesame oil, several dashes
Fresh ginger, 1 tsp grated and squeezed through a fine mesh strainer (or a few pinches dried ground)

Mix ingredients.  If garnishing meat or tamago, place in a pastry bag with a fine tip, or a sandwich bag with the very corner snipped off, and pipe away.

Monday, October 8, 2012

Smokey 40-Clove Braised Chicken


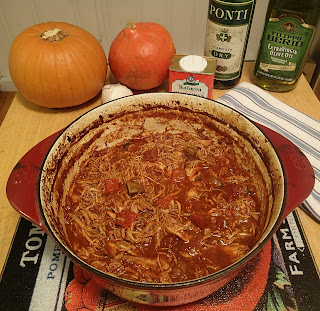
 Summer gets all the attention.  Fresh vegetables, grilling, picnics, all that good stuff.  But for my money, Fall is really where it's at.  When the weather turns cool, it's time to make some slow-cooked, hearty peasant food with deep, rich complex flavors.  While Summer is all about the ingredients, Fall is all about time and technique.  Summer is a culinary one night stand, while Fall is...well, you get my drift.

This dish came about, as many good dishes do, out of what was ready to hand in the pantry.  Smokey, subtly spicey, and sweet with slow-cooked mellow garlic and red peppers, it is easy to make but is bowl-licking good.

The short version:  sweat the veg, brown the chicken, deglaze with dry vermouth, add the tomatoes, stock and spices, braise in the oven for a couple of hours until the chicken pulls apart easily.  

Full recipe:

5 lbs boneless skinless chicken thighs or breasts (one large family pack)
3 bulbs garlic (you read that right), cloves separated and peeled
1 large yellow onion, 3/4"dice
1 large sweet red pepper, 3/4" dice
1 package (8oz) fresh button mushrooms, quartered if large
Two  14.5oz cans diced tomatoes
1 small can tomato paste
3/4 cup dry (white) vermouth
2 cups chicken stock or low sodium canned chicken broth
1 tsp liquid smoke
1-2 tbs sweet Hungarian paprika
2 tsp dried herbs
olive oil
kosher salt
freshly ground pepper

Preheat oven to 250° F.
Preheat a heavy pot with lid, preferably an enameled cast iron dutch oven, over medium low heat.

Sweat onions in olive oil, with a sprinkling of salt, until they just begin to soften.  (Note: I like to add small amounts of olive oil as I go, adding just enough for each step).  Add mushrooms, adding oil if needed, and continue to sweat until onions become translucent and mushrooms soften and pick up some color.  Toss in the garlic cloves a couple of minutes before the other vegetables are done, and saute, then remove everything to a bowl and set aside.

Turn up heat, adding oil if needed.  Quickly brown the whole chicken pieces, working in batches if needed, until they just get some color all the way around.  Remove to a plate.   Add tomato paste to the oil, frying a couple minutes to caramelize the sugars, scraping the bottom of the pan as you go.  Deglaze with the vermouth, scraping any remaining brown bits from the bottom of the pot, followed by the tomatoes with their juice, and the stock.  Stir, allowing to reduce and thicken a couple of minutes.  Stir in liquid smoke, paprika, and black pepper, season with salt if needed.  Add vegetables, sweet pepper, and chicken,, making sure chicken is covered in sauce.  Cover with lid, and move to oven. Cook 2 hours.

After 2 hours, remove pot.  At this point the chicken should be able to fall into shreds if pressed with a spoon.  Stir in herbs (I used an Italian herb blend and fines herbs, along with some ground marjoram).  Shred the chicken with a couple of forks, incorporating into sauce.  Move back to the oven for another half hour.  Remove and serve.


Tuesday, July 24, 2012

Summer Slaw


Wild Fennel growing roadside by the Yuba River, CA.
Fennel grows wild throughout California.  It is often found in the mountains by the side of the road and along paths near the coast, and so naturally comes to mind when I think of summer.  The sweet, slightly liquorice-y smell is a pleasant reminder of cool shady hollows found on warm summer days of hiking or fishing. 

When we think of fennel for cooking, it is usually in relation to using the seeds in Italian sausages, or something similar, but the fresh bulb is such a wonderful vegetable, whether braised, grilled, or shaved raw into a salad. The latter works particularly well to punch up another summer classic: Coleslaw.

This recipe uses plain nonfat Greek yogurt, with just a couple spoonfuls of mayo to enrich the flavor.  This is a technique I use for many dressings and sauces, from creamy salad dressings, to tartar sauce, to tuna and chicken salads, it takes very little mayo to bring the flavor, and the Greek yogurt brings the creaminess without the fat.  In this recipe, the side benefit is that you don't have to cut the dressing with milk to cut down on the greasiness of the mayo, so the dressing is thicker and sticks to the slaw better, without tasting heavy.  This slaw is light and refreshing, but satisfyingly creamy, sweet, tangy, & spicy.


You can buy your cabbage precut (I prefer the fine "floss" cut), or slice it thinly with a knife or thin slicing disc with a food processor, but to get a really good texture on the fennel, I recommend using a mandolin with a matchstick or shredding attachment.  I use a cheap green plastic one I got from the Asian market, and use the medium shredding comb with the blade set thin.  I use the same mandolin for the cabbage, leaving off the shredding comb, and slicing very thin, then discarding any overly thick pieces from the ribs. 


This slaw goes great with barbeque, but holds it's own with more sophisticated pairings too.  Try stirring in a teaspoon of poppy seeds, or serving with sweet and spicy cold Thai sliced sirloin for a cool meal on a hot day.


Summer Fennel Slaw

½ cabbage, sliced fine
1 bulb fennel, shredded fine
1-2 red jalapenos, sliced fine
table salt
1 (7-ounce container) plain nonfat Greek yogurt
2 tablespoons mayonnaise
1 teaspoon cider vinegar
1 teaspoon sherry vinegar (optional)
1 teaspoon sugar or equivalent sweetener
½ teaspoon Dijon mustard
1/8 teaspoon ground white pepper
1/8 teaspoon ground fennel seed
1 tablespoon minced fresh parsley leaves


Shred or slice cabbage fine, salt liberally, and set aside in a colander while you prepare the remaining ingredients.

In a medium bowl, stir together yogurt, mayo, vinegar, Dijon, sweetener, pepper, fennel, and some of the parsley.

In a large bowl, shred the fennel, and add the jalapenos, sliced into very thin julienne.   Rinse the cabbage briefly, squeeze out excess water, and place in a salad spinner lined with paper towels.  Push to edges, distributing evenly so as to give a smooth spin.  Give it a couple of spins, and then remove cabbage to the big bowl.  Stir dressing and vegetables together and season to taste if needed.  Sprinkle remaining parley or minced fennel fronds over slaw to serve. 


Thursday, February 23, 2012

TOMATO JAM


Recently, I stumbled upon a recipe at theKitchn for Oven-Roasted Tomato Jam.  I was excited to try this, since I like savory jams, it had a neat twist with the addition of cinnamon, and it looked very simple.  Unfortunately, the results were less than spectacular.  The garlic burned, much was left stuck to the foil lining the pan, and the texture was dominated by tomato skins. So I tinkered with it a bit, and the results were much improved.

The original recipe calls for either fresh or canned tomatoes, with the fresh being preferred.  The problem with using fresh tomatoes is that you end up with a bunch of tough papery tomato skins, which really throws off the texture.  You could blanch the tomatoes and skin them, but I found that for this recipe, canned works just as well.  The flavors are intensified by the roasting, so I couldn't tell much difference in between fresh and canned in the final product.  It is 1-2 hours quicker to use canned as well.  I used the entire can of whole plum tomatoes, including all of the juice, which reduced down to a nice consistency.   This yielded about a half cup of jam, so next time I may try doing two cans at once in a single baking dish.

The original calls for using a metal pan lined with aluminum foil.  The jam tended to burn in places, and stuck to the foil, even using generous amounts of olive oil.  When stirring, the foil tended to tear as well, making a mess, and worried me that I could accidentally incorporate scraps of foil into the jam.  Acidic tomatoes, aluminum, and time are not a good mix in any case, so for the second batch I switched to a 9"x13" glass baking dish.  This not only cut down on the burning, it also allows you to scrape up the tomatoes with a sturdy spatula in order to stir them. 

Speaking of burning, most of the garlic ended up burnt and blackened in the first batch.  While using canned tomatoes cut down on the cooking time, I decided to play it safe and roast the garlic separately and incorporate it back in at the end.  This gave me more control.  For this particular batch, I didn't have enough garlic, so I roasted some shallots with the garlic cloves.  This was serendipitous, as the texture and flavor of the shallots were a nice addition.


Oven-Roasted Tomato Jam


1 28 oz can peeled whole tomatoes
3-4 cloves garlic
3-4 shallots
Olive oil
Kosher salt
Freshly-ground pepper
1/2 teaspoon cinnamon

Preheat oven to 325°F.

Empty an entire can of peeled whole tomatoes, including all the juice into a 9x13 glass baking dish. Break up the tomatoes a bit with a sturdy metal spatula. Drizzle tomatoes generously with olive oil.  Sprinkle with a couple pinches of salt, a few grinds of pepper, and sprinkle with the cinnamon.

Bake at 325°F for 1-2 hours, until juice has thickened to a paste and tomatoes are soft.

Meanwhile, put the garlic and shallots in an oven-safe roaster or coffee mug,  and bake alongside the tomatoes until soft and mellow, about an hour.  Remove, peel, mince, and set aside.

Scrape tomatoes up with your metal spatula, turning and mixing, and breaking up any large hunks.  Increase heat to 450°F and roast tomatoes for another hour, turning and stirring every 15 minutes or so to mix the dark parts back in.

Mix in garlic and shallots, and mash together to a jam-like consistency.  Place in a jar or other container and refrigerate.

Serve with bread or crackers and soft cheese.

Sunday, January 29, 2012

BREAD FAN


Ahh bread, the staff of life.  The oldest and most basic of prepared foods, a staple for at least 13 millennia.  For much of human history, bread was the primary food for most western peoples.  For something so basic, so fundamental to our existence, and produced so early in our history, you would think this is something most people would be able to make.  And yet most of us plunk down our hard-earned cash to buy either cheap factory-made crap that is full of air or wood pulp, or expensive artisanal breads. 

It doesn't have to be this way.  Mark Bittman wrote an article in the NY Times about a recipe for bread that requires no kneading and is baked in a pot.  It produces a good crusty loaf that matches the artisan bakeries, but at $0.15 in flour and yeast versus $5.00.  By baking in a pot, you keep the humidity high at the start, which allows the crust formation like those fancy steam ovens. It used a 18-hour rise to develop a complex, deep yeasty flavor.  This recipe has been adapted a bit since then, evolving as other people have tried it, and the result is a recipe that is easy, can be done in a day, and stacks up well against anything Whole Foods is putting out. 


Recipe: No-knead bread

Ingredients:

3 cups (375g) bread flour or all-purpose flour
3/4 teaspoon yeast (whatever kind you have handy)
1 1/4 teaspoon salt
1 1/2 cups slightly warm water
cooking spray

Mix the flour, yeast, and salt in a large bowl. 

Add water to flour mixture, stirring very thoroughly.  You will have a loose, sticky dough.  The favored term seems to be "shaggy".

Spray dough with cooking spray.  Cover bowl with plastic wrap and a dish towel, and sit in a warm place, around 70F, for 8 hours, (or up to 18 hrs if you are in no hurry).   It should at least double in size, and the surface will be covered in small bubble holes.


Spray counter with cooking spray, and turn dough out onto counter.  Fold once or twice, cover with plastic wrap, and let rest an hour.   I used flour for this step, but the dough is so sticky, I think I'll use spray next time.   I could already smell that great yeasty smell at this point. This is gonna be good!


At least 20 minutes before the hour is up, put your pot in the oven, preferably an oven-safe dutch oven if you have one, and preheat.  The various recipes called for 450-475F.  I used 460, and that was fine, might even do a little higher next time.

When the hour is up and the dough has risen to twice it's size, pull the pot from the oven.  Quickly pull the dough into ball as pictured above, and drop into the pot.  If the dough is too sticky to do this neatly, don't worry, just dump it into the pot as best you can.

Bake for 30 minutes.  Remove lid from pot and bake for 15-20 minutes more, until golden brown and an instant read thermometer reads an internal temperature of 210F. 

My loaf did not stick at all. I just reached in carefully and lifted it out. As it cooled, I could hear it crackle.

As you can see, the texture was light but no big air pockets, and with a nice thick chewy crust.


First slice was plain with butter.  Good structure, held up well to the buttering even when still warm, and nice and moist.  Taste was as good as any french loaf I've had.  This would be amazing with sourdough starter instead of yeast.

After that, I made lunch: a tuna salad sandwich.


Well folks, I think I'm done buying bread.   There's no reason not to do this, it is easy, cheap, and so good.  Let me know what you guys think.  Hope it works for you too!